Charcuterie or charcuterie boards have become the rage lately. The word charcuterie is a French word that originally referred to smoked or dried meats and a variety of cheeses. The charcuterie board, then, was a way of serving a variety of meats and cheeses to be sampled. But, oh my goodness, has the use of the charcuterie board come a long way in the last few years.
Tammy Fleming, the owner of Crossroads Cafe in Demorest, has been creating charcuterie boards for years. She always packed the wooden boards when the family went on vacation and used them throughout the vacation to feed the family and keep the time spent in the kitchen to a minimum.
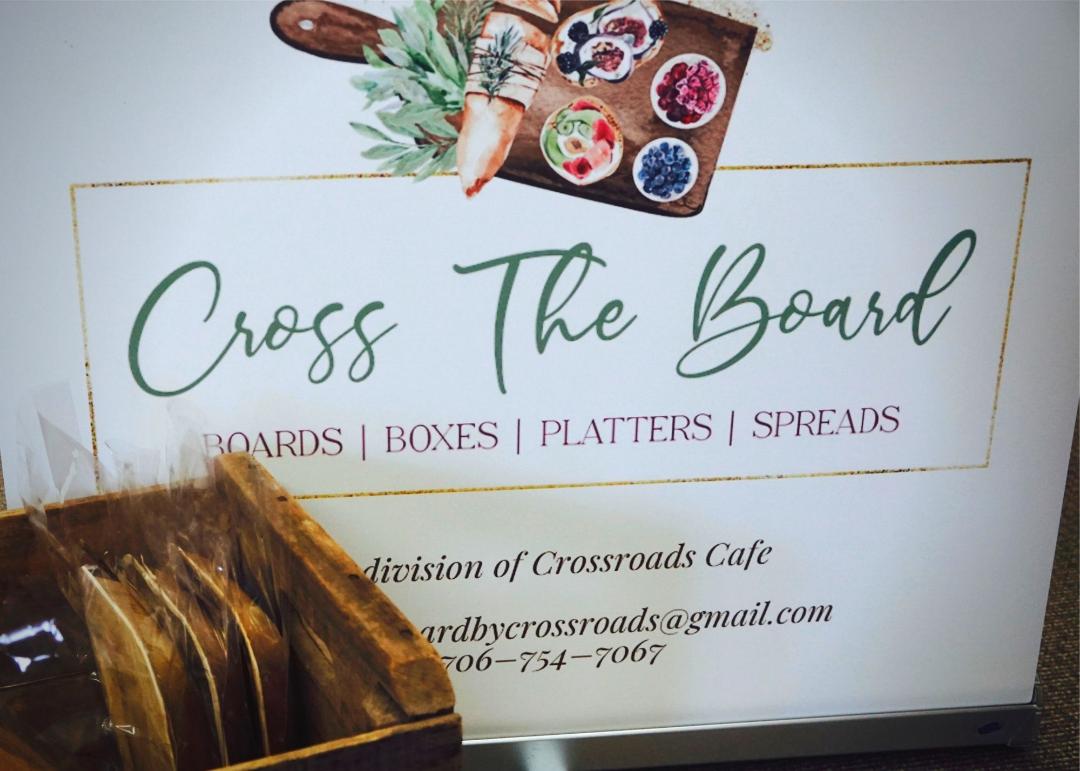
Tammy’s daughter, Kaitlin Ellison, has picked up that tradition and now runs Cross The Board, a new division of Crossroads Cafe. Cross The Board specializes in catering events and creating unique gifts of food. Kaitlin has become one of the local experts in how to create a charcuterie board.
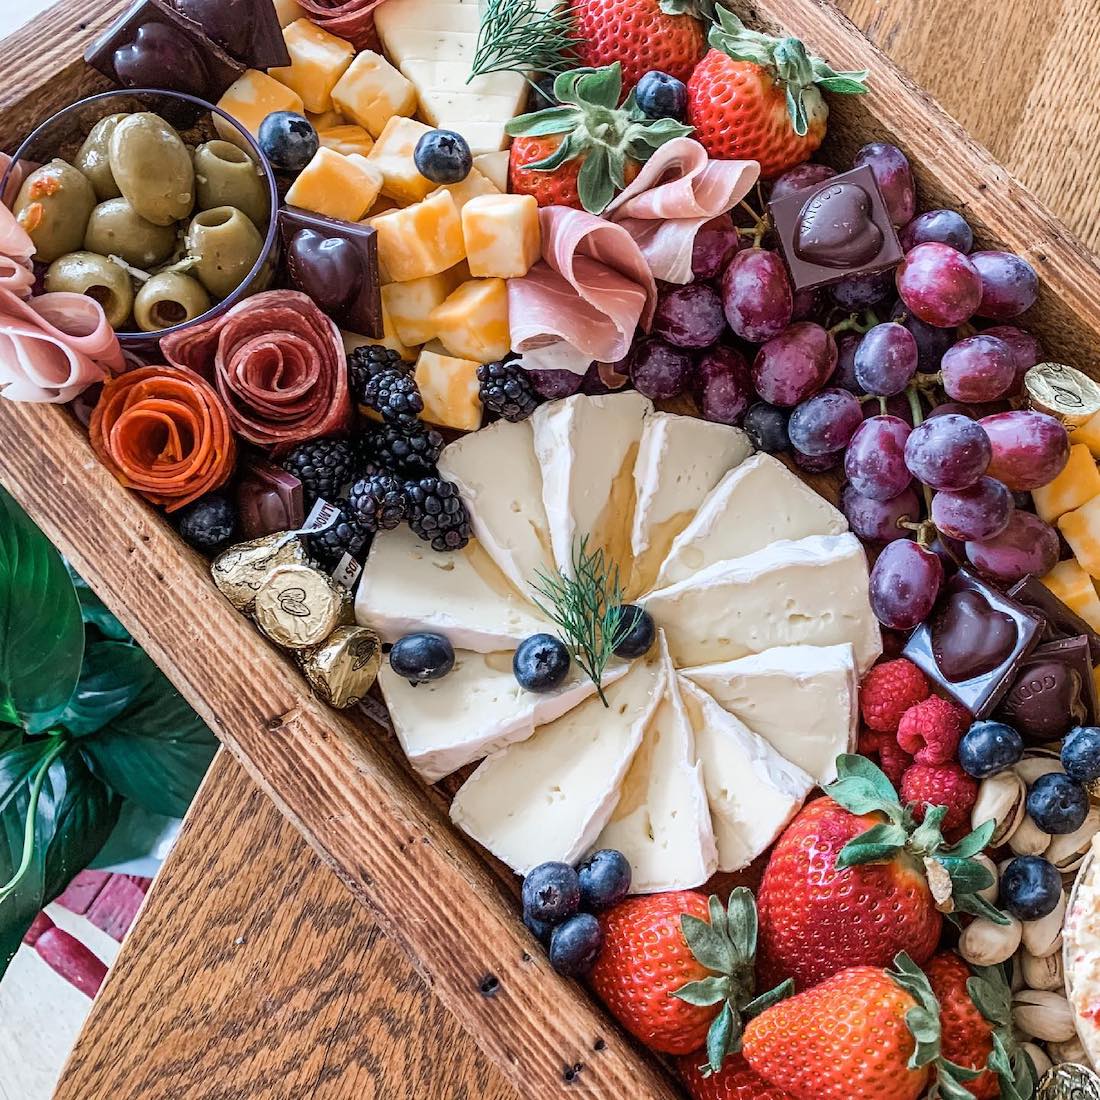
Charcuterie boards in the United States tend to have much more than just meats and cheeses, typically adding fruits, sweets, nuts, and sauces. According to Kaitlin, all these extras are referred to as charcuterments.
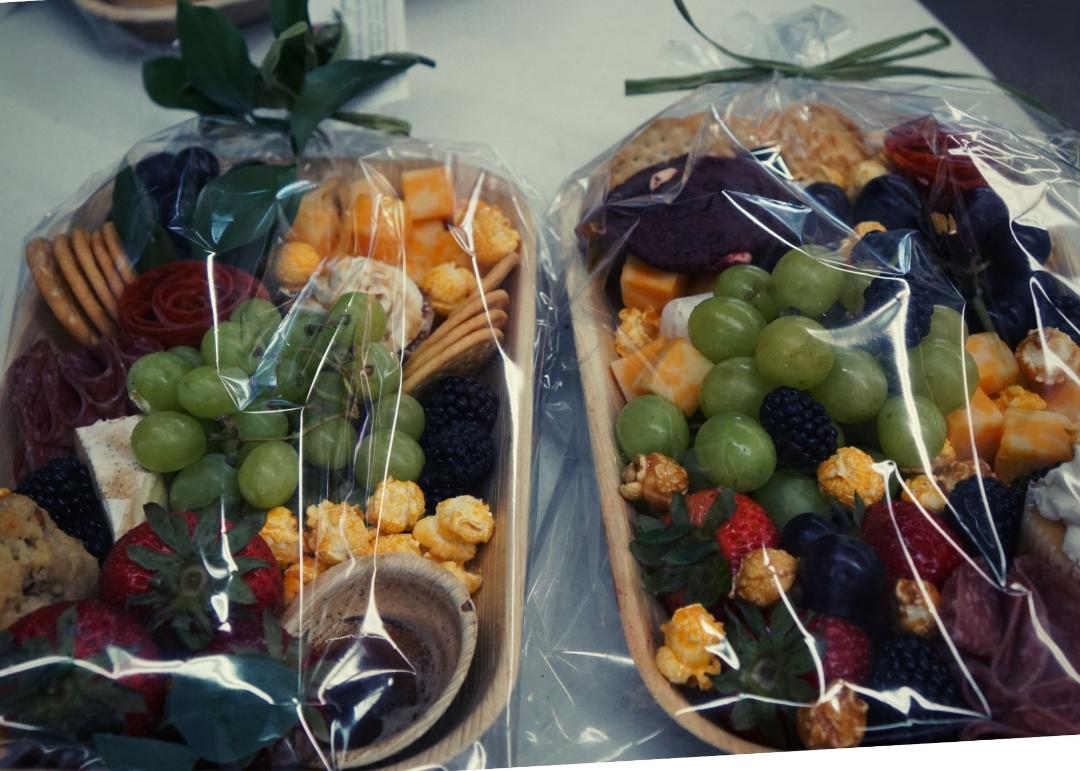
Cross The Board provides charcuterie feasts for wedding receptions, baby and bridal showers, and home parties. Kaitlin also provides boards that can be gifted for any number of reasons – like a housewarming gift, a get-well gift, or a birthday gift. The possibilities are endless.
How to put together a charcuterie board
I recently attended a class at my church that Kaitlin taught. Not only did she provide an amazingly beautiful charcuterie display for us to graze on, she also provided the ingredients and led us to create one to take home. It was a fun, informative, and creative evening.
From what I’ve read recently, people don’t always start the process the same way. Kaitlin has a step-by-step process and, after working through it, it makes sense to me. She divides the food she’s going to use into four sections: (1) fruit, (2) cheese, (3) sweets, and (4) meats. Her reason for the order is that, by waiting until the end of the board to add the meat, she doesn’t worry about keeping the meat unrefrigerated for long. So, here’s Kaitlin’s step-by-step instructions.
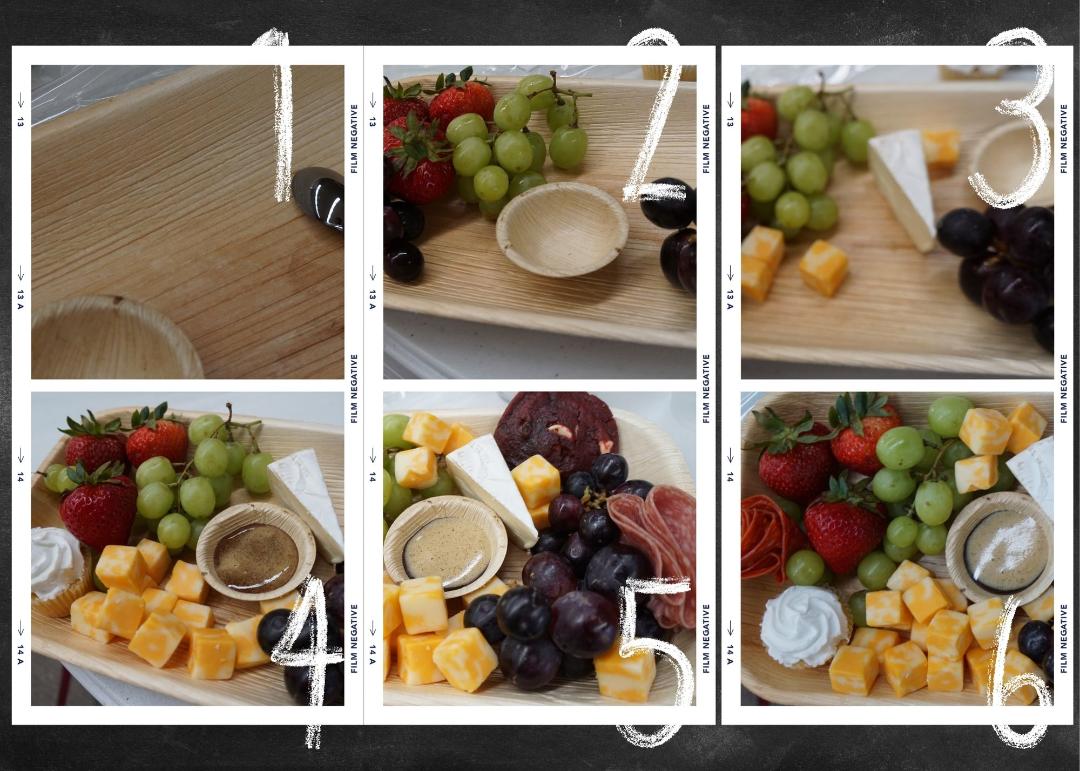
(1) Choose your board and add serving bowls.
Kaitlin used multiple boards in the charcuterie she did for us. In fact, it was large enough to feed 30 people. She planned out the boards, using them to create height and distinct areas.
Charcuterie boards can be purchased in most home goods stores and on Amazon. The prices vary, based on the size of the boards and the kind of wood used. By using multiple smaller boards, Kaitlin’s display was intricate and interesting. If you’re interested in using charcuterie boards while entertaining, consider starting small and then adding other boards as you go.
Kaitlin uses small bowls for sauces and things like pimento cheese that needs to be kept together. Put the bowls on the empty boards where you think they’ll make the most sense. You can use bowls from you already have, but keep the size in mind as you choose them.
(2) Add fruit.
Group fruit together in sections, but depending on how large the charcuterie is, you may need to spread them throughout. Keep fruit in groups by color, and spread them around to bring those colors throughout the boards. Kaitlin holds back the blackberries and the blueberries, because she uses those for filler and for accessorizing at the end.
(3) Add cheese.
You want to use several types of cheeses with different flavors and textures. Use a soft cheese like brie, and then an aged cheese like Colby Jack. Brie can be sliced and spread out to give it a fan-like shape. An aged cheese can be purchased already sliced or in cubes, which will help save preparation time.
(4) Add sweets.
Kaitlin used mini-frosted cupcakes that she placed in groups around the outside of the charcuterie. She also worked in a variety of cookies and crackers into areas on the board. You could add rolls and breadsticks as well.
(5) Add meats.
Kaitlin used salami and pepperoni. Other meats could include sliced prosciutto, sliced summer sausages, and chorizo. Round salami slices can be folded in half and then in half again, and lined up on the board to create a salami river. Round pepperoni slices can be folded in half and then rolled into a cone shape. By adding extra slices of pepperoni, a pepperoni rose is formed. (If you look at the feature photo you’ll see an example of both.) This should not be a surprise, but on Pinterest, I saw several tutorials of how to create the salami river roll and the pepperoni rose.
(6) Add sauces and finishing touches.
Kaitlin had a chocolate fudge sauce next to the strawberries, and a marshmallow fruit dip next to the grapes. She also had a special sauce of maple syrup, brown sugar, honey and cinnamon to drizzle over the cupcakes. I was told to use more brown sugar than anything else, a little maple syrup, just a little bit of honey and a dash of cinnamon. I haven’t tried to make it yet, but it was incredibly good. (I licked the spoon.)
Add other sauces and last-minute additions. Some of those could be spicy, such as mustard, olives, and honey mustard dipping sauce. Others could be sweet, such as fig preserves or strawberry jam. You can also scatter a few berries around and add fresh herb leaves to finish it off.
Possible charcuterie board options
If you want to do some research, go to Pinterest and search “charcuterie board ideas.” You’ll be amazed at the possibilities. Boards can be small or large. The boards can be designed to feed an army or dinner for two. So, size matters.
Also, charcuterie boards can be created for appetizers, dinner, dessert, and even breakfast. There’s no limit to how the boards can be used. If you can dream it, you can do it.
Why create a charcuterie board
I’ll give you a couple of reasons of why a charcuterie board is a great thing to know how to do.
First, the charcuterie board is designed to give people options to graze,. That means that it is a great way to entertain. Instead of sitting in a more formal setting, your guests can move around, sample a bit of everything, eat until they’re stuffed, and talk to each other the entire time. It’s a casual and fun way to entertain.
Second, it’s actually less labor-intensive than cooking a big meal for a big group. Everything on the board can be cold, nothing has to be cooked, and much of it can be purchased already prepared.
It only took Kaitlin about an hour to put the board together for our gathering. That’s not a lot of time to prepare to feed 30 people and clean up was a snap.
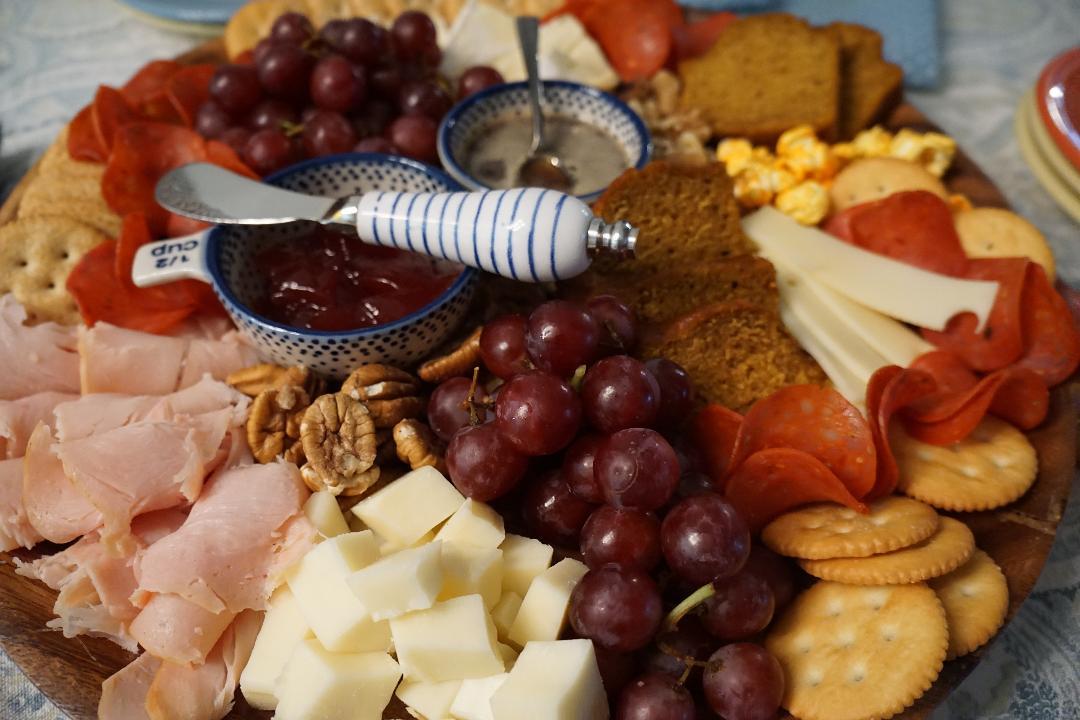
Here’s proof of how much we enjoyed the class. This board is mine, with help from my daughter and grandchildren. They’ve loved making it and loved eating it for lunch. We made this one up from stuff mostly in the fridge and the pantry.
Kaitlin is available to do a class for your group or to cater your event. You can reach her online at Cross The Board, or by phone at 706-968-1709.